
It’s always a wonderful Sunday. It’s my favorite day of the week! But, when the afternoon includes time to stamp, it’s all the better. It’s 70 degrees in mid-Missouri, our windows are open, the kids are enjoying the trampoline and Wes is off hunting. Perfect for the Featured Stamper Challenge at SCS.
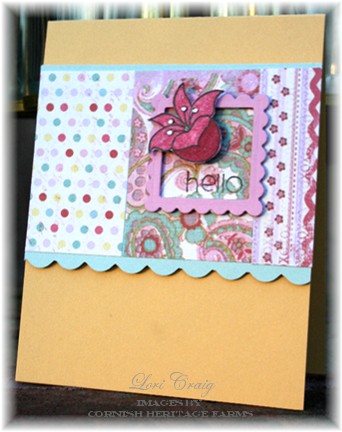
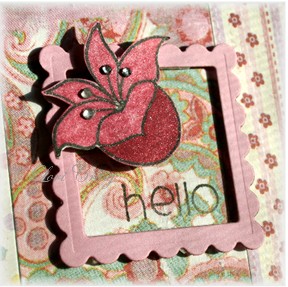
Today’s FS is Nancy Riley, and I chose her beautiful Happy card, shown here as a springboard for my card. I had some pretty Maybe Baby Daisy D paper that just arrived from Jacksonbelle, and I knew this layout was a perfect start. I added a matting for the patterened squares and used a frame cut from my Nestabilities to showcase this Bloomin’ Beautiful Blossom that is colored with my Copics, Garnet R39.
For the Copic Tutorial click below:
The tricky thing about learning to use Copics, for me, was to learn the shading process. It is helpful to have several close shades of color when you want to varigated shading on an object, in this case the blossom. Since I do not own any Copics really close to R39 in either numerical direction, I used my blender pen to varigate the shading. Unlike the typical ‘blender pen’ that you might use for dye ink or pastel chalk, the Copic blender does not ‘shift’ the color. It simply removes color from the places that you touch. Here are a couple of photos so you can see how I got the end-result color with one Copic color and a blender pen.
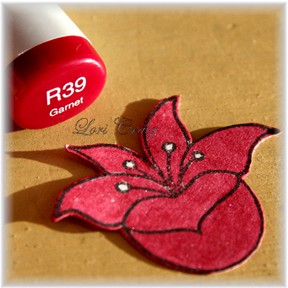
Start by coloring your image with solid Copic color. This is different from ‘watercolor’ where you would apply your color to the portion of the image that you wanted the darkest shading on and then use the blender to ‘shift’ muted color to other portions of the flower petal.
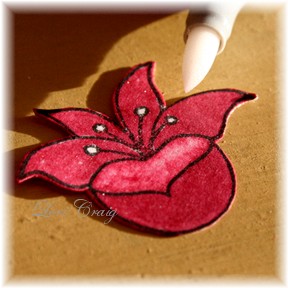
Once you have colored the entire flower, use your blender pen to lift color off of spots that you would like highlighted or ‘lightened’. In this case, the lower center petal.
I continued lifting/removing color on the petals until each one was lighter than the bulb. When I was satisfied with the lighter petals, I went around the base of the flower bloom one more time with my R39 Garnet Copic to give the base a crisp definition.
I am not a Copic expert. I am really looking forward to learning a lot at a Copic training that I am attending next month in Anaheim at CHA. Thanks for stopping by! Enjoy the rest of your wonderful Sunday.
-
Stamps: Bloomin’ Beautiful & Tag You’re It by Kim Hughes – Cornish Heritage Farms
-
Ink: Palette Noir
-
Cardstock: Barely Banana, Mauve Mist (retired) and Soft Sky – Stampin’ UP!, Maybe Baby Patterened Paper by Daisy D and Curious Iridescent Cryogen (Shimmery) White from www.cutcardstock.com
-
Accs: Copic Marker, Nestabilities, Rhinestone bling – Target Dollar Spot, Dimensionals


12 responses to “Featured Stamper – Copic Tutorial”