

I really enjoy working with sketches. My idea with Taylor’s Sketch this week was that I would use the cardstock square to frame the circled images placed underneath – not layer the circled images onto the cardstock square. Does that make sense? Of course, the end result was some squiggled stitching around the whole main panel, so it didn’t really matter which one ended up on top: the frame or the circles.
You might want to try the ‘frame’ method and give it some depth with dimensional dots sometime, so I have a fairly easy way to line up all of your circle holes to create the frame. After I shot all the prep photos – I had to roll with the final project – squiggled stitching and all.
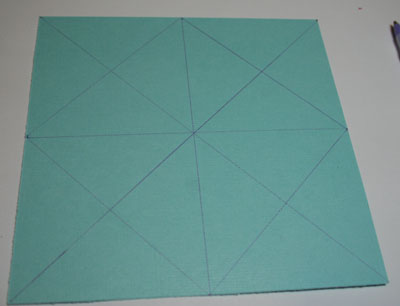
On the back of your cardstock square that will become the frame. Draw a big X corner to corner and a cross to completely mark the center and the equal 3 quadrants. Then complete the X in each of the 4 quadrants, as shown.
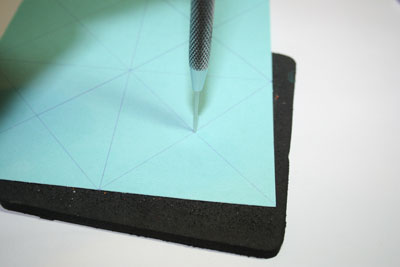
Use a paper piercing tool to mark a pin hole in the center of each of the 4 quadrants.
Flip the cardstock over so you are using your dies from the front. (A circle punch could be used from either direction, but I prefer to die-cut from the finished side of the project piece. Center your die or paper punch over the pinhole that you created from the back. Do this in each of your 4 quadrants.
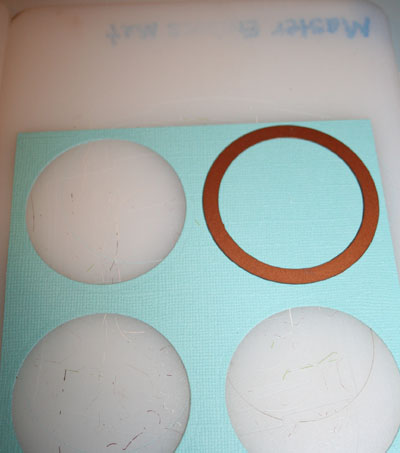
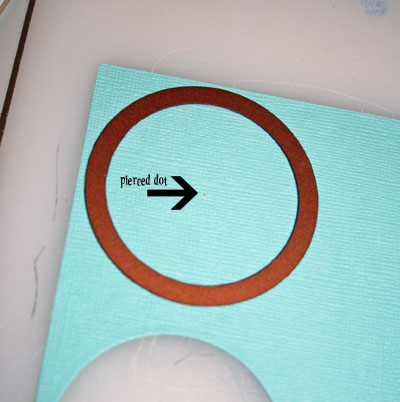
After the first and second circle, the last two become more easy because you can also ‘eyeball’ the side margins created on the first couple of circle cuts.
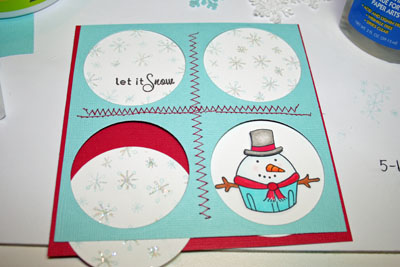
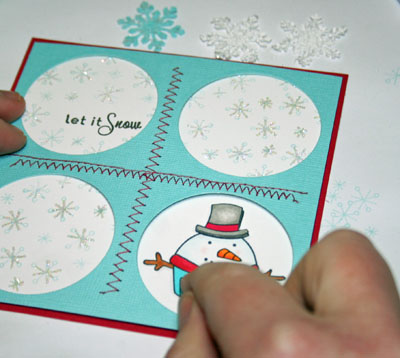
After I stitched the zigzags, I slid my images underneath the frame without adhesive to get a feel for the proper placement.
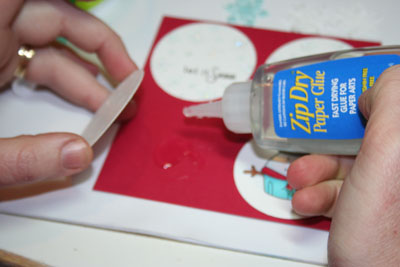
Then I carefully lifted each circle and applied Zip Dry Paper Glue from Beacon Adhesive. You should be able to get this at your local scrap store. This stuff is awesome on a variety of paper projects because it does not warp or buckle your paper and…
When you place your frame back over the glued circles, the glue has not yet set and has some ‘give’. This allows you to ‘shift’ your images around a little bit for centering and proper placement. You can’t do that with a tape adhesive. It does dry fairly quickly, and I’ve never had trouble with stuff shifting when it shouldn’t.
There you have it. Now, since it’s almost posting and new stamp release time, I’m gonna do spell check and then shuffle on over to Taylored Expressions. I think I’ll be having a little more ‘retail therapy‘ before I even go to bed tonight! See you tomorrow!
- Stamps: Home Sweet Home (Taylored Expressions)
- Cardstock: Pure Luxury White (GinaK), Iced Teal & Intense Pink (Prism)
- Ink: Memento Black Tuxedo (Tsukineko), Light Aqua (Adirondack – Ranger)
- Accs: Copic Markers, Snowflake Punches (2 – both Martha Stewart), Snowflake Die (Spellbinders), Diamond Dust chunked glitter, Zip Dry Paper Glue (Beacon Adhesive – Signature), Circle Nestabilities (Spellbinders)


7 responses to “Cupcake Sketch 49 & a mini tutorial”