Category Archives: Copics

Don’t Be Fooled … Crazy Cats and Copic Class News

cute and fluffy lori craig

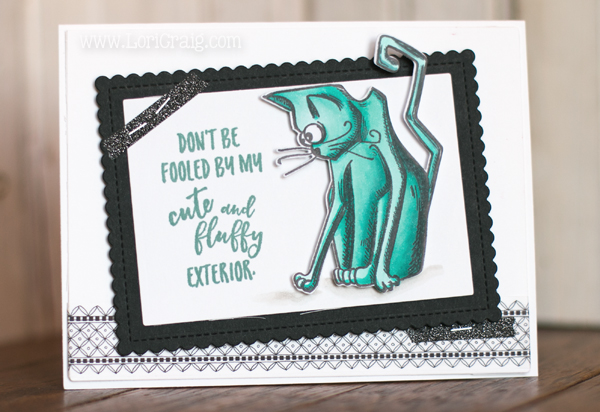
Don’t be fooled by my cute and fluffy exterior! 🙂 I’m sharing another sentiment set today… The Tim Holtz Crazy Cats are so popular, and a few months ago, Mary at Seredipity had penned some phrases that coordinated for just the right amount of spunk. This one made me laugh!

I’ve colored my cat with Copic Marker (BG11, BG13, BG15) and added some fun embellishments from Imagination International.

1397QCLMeowmix_274x274 This full set of sentiments that I put together from Serendipity is called Meow Mix – other favorites say “miss you more than catnip” and “meow’s it going” … fun stuff!


screen tones

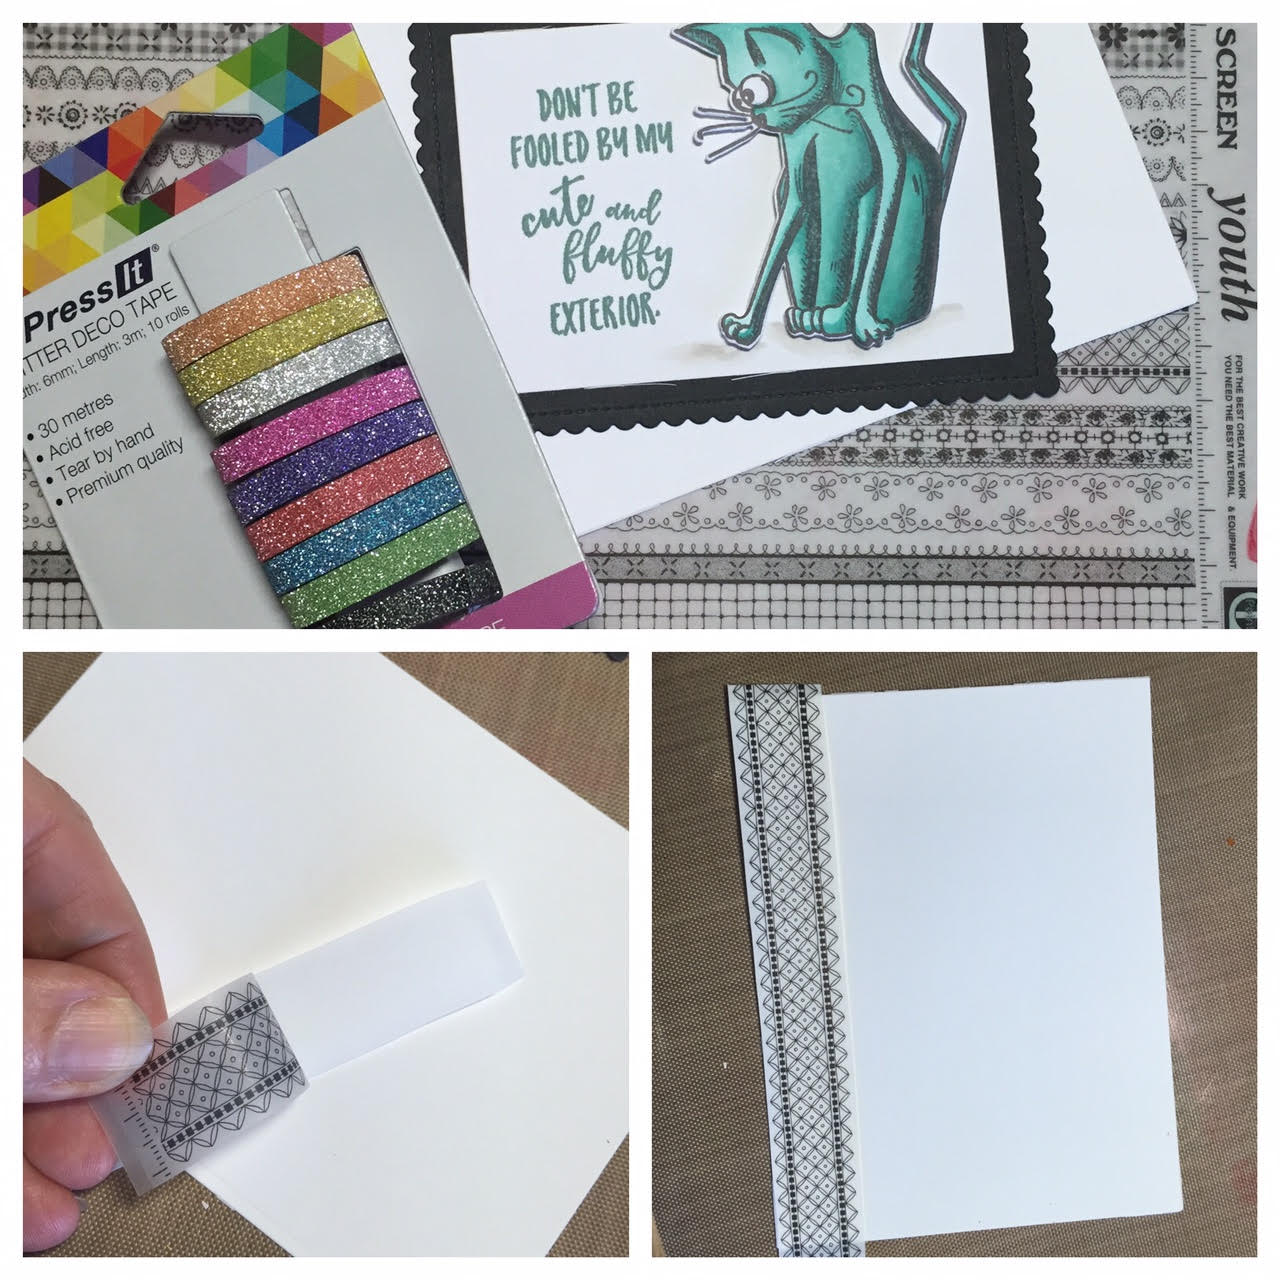
I am always looking for flat embellishments that won’t add bulk or risk of postage machine shred to my cards. On this card I’ve used XPress It Glitter Deco Tape – the glitter is super sparkly and flat – not chunky and you simply tear it off.

I’ve added a strip across the bottom from IC Screen Tones – a fun flat product from Imagination International. Screen tones are printed images and accents that on translucent, adhesive backed paper. You can cut them to the appropriate shape or size and adhere and they blend right into the paper that you’ve adhered them. There isn’t a visible ridge after you have burnished them to the paper with your finger tips and they look like hand-drawn art. Super fun! On this card, I used the Borders & Repeated Shapes 2. The sheets are large at 12.5″ x 9″ so you can make a lot of cards with one sheet!

UPCOMING FALL COPIC CLASSES

DM 02 Lori Craig I have had a great summer hanging around the house, but it is just about time for me to pack the Copic bags for my next classes! I will be teaching Whimsical Faces & Hair, Vintage Values & Monotones and Dress for Success at the end of August in Dallas! You can find all of the details and see our full schedule HERE! We’ve got some great locations coming up: Charlotte, Chicago, Edmonton, Sacramento! Good times!

I think that’s about all for today! I did get my bedroom painted yesterday. Cleaning up the mess and putting socket and switch covers back on this morning! Crafting this afternoon! It’s going to be too hot for anything else! Bring on my markers and the AC.

Stay cool!


Floating By – fun news & an intricate die tutorial

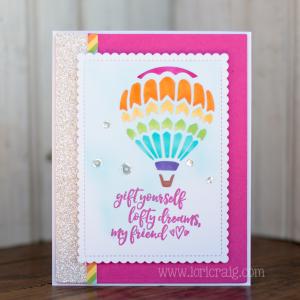
LoftyDreams Photo 1 Lori Craig

Something fun to share today… Several months ago Mary at Serendipity Stamps asked me if I would consider putting together some sentiment sets for her to coordinate with some stamp images that she had recently released. First I was honored, and second, I had never considered that before. But I thought, why not try? And, this week, I am sharing a few of my favorite sentiments with you!

LoftyDreams Photo2 Lori Craig

1398uplifting_274x274Of the sets I have created for Serendipity Stamps, Uplifting Words is my favorite! Great encouragements and well-wishes here that would work well for balloons, clouds, birds in the breeze…


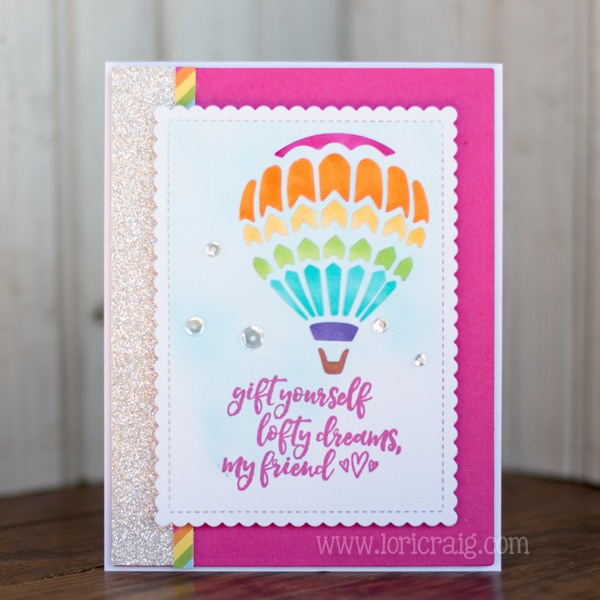
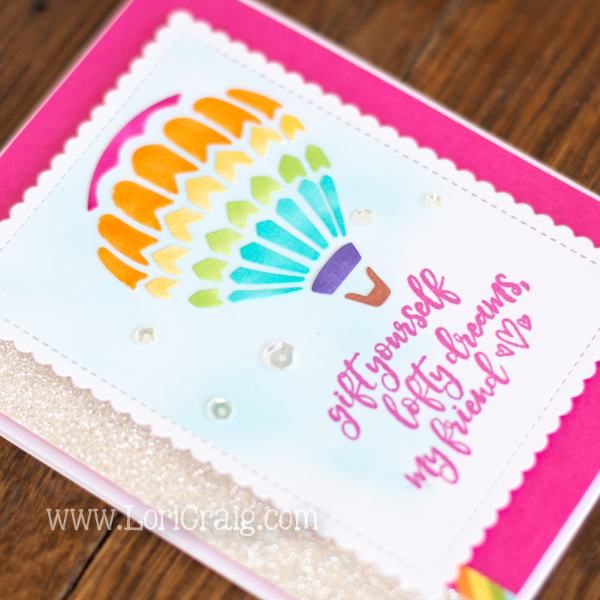
LoftyDreams Photo 1 Lori CraigI’ve paired it on these projects with balloon elements from the Hot Air Balloon Reverse Die. The balloon is colored with Copic Marker (RV17, YR04, Y15, YG23, BG45, V17 and E23). The sentiment is stamped with Taylored Expressions Lollipop Dye ink. The Lollipop pink cardstock and the striped Rainbow Bright striped patterned paper are both from Taylored Expressions. The Stitched Mini Scallop Frame Dienamics are from MFT. The glitter paper was a gift to me from a friend… I have been hoarding it, and I believe it is from Stampin’ Up!

064hotairballoons_274x274 Hot Air Balloon Reverse Die is a plate that allows for a lot of creative flexibility… it cuts of both single hot air balloons or a full card-front negative. I lived in Des Moines, Iowa when I was a young girl, and I love going to the Indianola Hot Air Balloon Festival to watch scores of bubble beauties soar the Iowa plains. So pretty!


The balloon plate die does cut a LOT of little pieces (both of my cards today were created with the same die-cut – one piece of paper!) and those can be pesky to create with, so I reached into my bag of tricks for an incredible, paper-craft-life-altering tip from my friend and neighbor (love having her closeby!), Laurie Willison! Laurie has changed the way many people use intricate dies with her Press’n Seal – yes that stuff in your kitchen – Trick!

Continue reading

Scatter Sunshine with Envelope Art

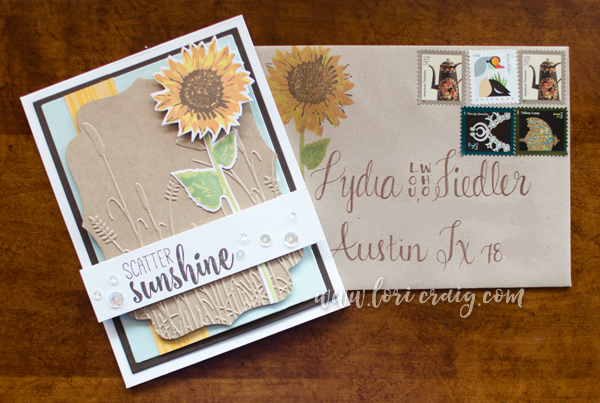
Sunshine Lori Craig_5870

I’m scattering kansas sunshine today… sticking this card in the mail to a friend who is a real blessing to me! Love these Simply Stamped Sunflowers and sentiment from Taylored Expressions. I’ve used them here with Taylor’s new premium dye ink and the Prairie embossing folder.

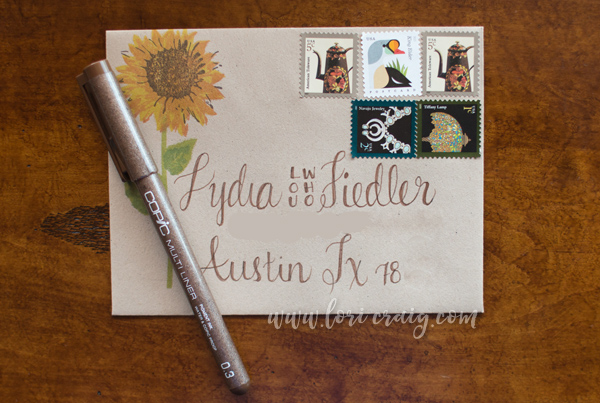
lori craig IMG_6434

I’m still working on my hand~lettering and taken to the old school postage look! I love the colored Copic Multi-liners for my hand~lettering. I like these because they are inexpensive, safe to use with water-color or Copic Marker, and they come in nine different colors with a variety of nib sizes.

Adding some postage flare is an easy way to make your hand-stamped card stand-out in the recipient’s mailbox! It was fun to shop for smaller valued postage stamps at www.usps.gov. My local post office doesn’t seem to have many options or variety anymore for 1-cent to 20-cent values… Ordering online, the shipping was super cheap and a one – maybe 2-day turn-around.

lori craig IMG_6433

Thanks for stopping by… I hope you have a beautiful day! And … let’s get those cards in the mail today, friends … scatter some sunshine!

So Loved and a Copic Class Giveaway

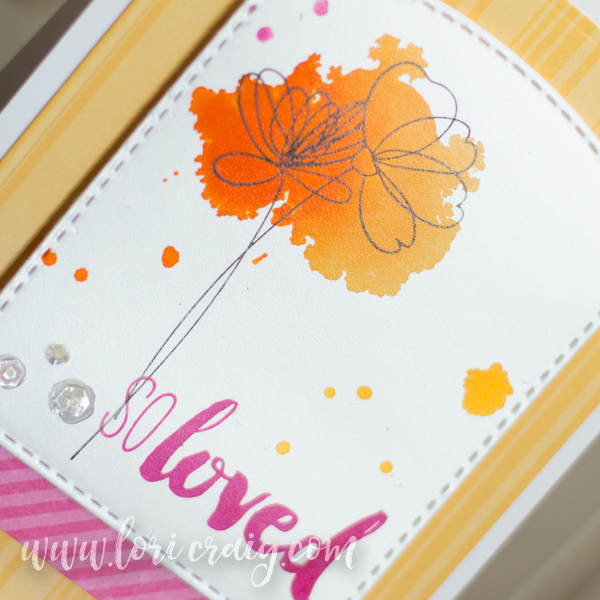
so loved lori craig IMG_6297

 Thanks for stopping by today! I’m sharing in a Copic Team Blog Hop and prize!

My personal Copic classes are finished up for the spring, and the entire team is taking a break from traveling this summer to prep for our upcoming 2016 fall workshops and the 2017 curriculum!

This fall More Whimsical Faces and HairVintage Values and Mono Tones, and Dress For Success: Clothing and Accessories Workshops will all be taught in the following locations:

  • Chicago, IL August 19th-20th **
  • Dallas, TX  August 26th-27th ** and taught by ME! 
  • Edmonton, AB August 26th-27th **
  • Charlotte, NC September 9th-10th
  • Las Vegas, NV September 23rd-24th
  • Sacramento, CA September 23-24th
  • Boston, MA October 14th-15th
  • Hanover, MD October 14th-15th
  • Portland, OR October 14th-15th

** Registration now open

Be sure to register for Copic e-mail notifications HERE (bottom of the page) so you will be the first to know whenever new classes are open in your area.

Now for the prize:

One lucky winner will receive a pass to attend a Copic Coloring Workshop in the US or Canada in the 2017 season.

We will not be offering an alternative prize for those living outside the US or Canada. You are welcome to participate, but be aware that the prize is for a class in the US or Canada in the 2017 year.

How do you win?

There are six simple questions at the end of Michelle H’s post HERE. Visit each of the blogs listed below to find the answers then send those answers to Michelle in a quick e-mail at [email protected].  Those who have all six questions answered correctly will be entered into a drawing to win. E-mails must be received no later than midnight eastern time,Saturday, June 25.

so loved lori craig IMG_6304

Today I’m sharing a card that I made for my daughter using one of my favorite non-marker Copic techniques: Dripping with Copic Various Ink Refills! I love how vibrant the ink remains on the surface of glossy cardstock!

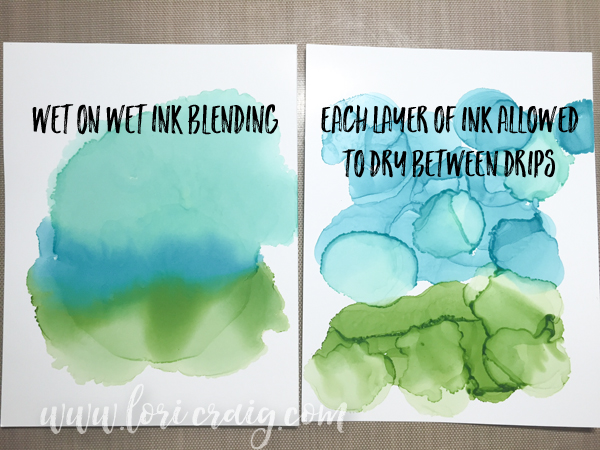
For this card, I have dripped YR04, Y32 and Y35 onto glossy cardstock and allowed the drips to dry. The trick for colors that blend seamlessly from one shade to the next is to keep each color wet on the paper while you are still adding other colors (example below).

I followed the dripping up with an over-stamped floral image from Taylored Expressions Sketch Blooms in black and a sentiment from Free Spirit stamped in Strawberry Milkshake Premium Dye Ink from Taylored Expressions. The white sequins are so shiny! Shine Bright Mix from Verve Stamps! The floral layer is cut with Build-aTag #4 – Taylored Expressions.

lori craig IMG_9398

Dripped inks are vibrant on glossy cardstock and dry very quickly, making it a fun, artsy technique to try. The glossy cardstock allows this ink to sit up ontop of the paper, mixing and melding.

Above on the left, I have dripped three colors together very quickly so that all of the inks are wet at the same time and blend smoothly. On the right, I’ve allowed individual drips to dry before adding more, creating distinct lines of ink between each color! There isn’t a right or wrong way to do it – it’s all personal preference!

So that is all I have today, but I’ll be back soon! Be sure to visit Michelle H’s blog HERE to find the questions and the blogs below to find the answers:

Good luck, and thanks for stopping by!  🙂

Copic T-Shirt Winners!


copic tshirts

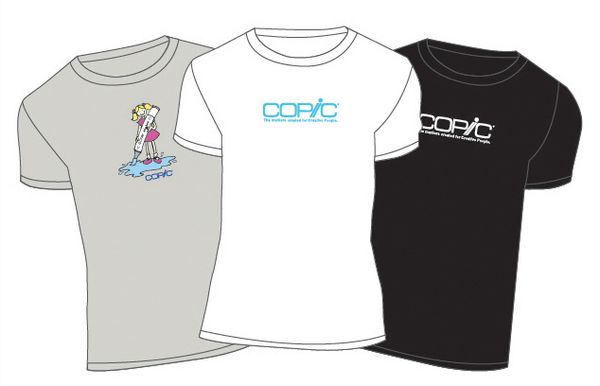
Winding up my fun Copic T-Shirt give-away! Thanks for all of the responses here and on my Facebook page! I’ve selected 10 winners for my comments and shares! I have sent messages to my lucky winners and they are:

  • Lynn Tague
  • Michelle R
  • Lisa Cool
  • Tammy Tutterow
  • Trey Clemons
  • Karen Q
  • Sheri D
  • Wendy M
  • Trace
  • Annette Hinds

I’ve been working in my studio with a new desk, trying to get my space set up in a way that is functional and pretty! I hope to be sharing pictures soon! Have a great Sunday!

Hot Stuff! Copic Giveaway!

disco donna

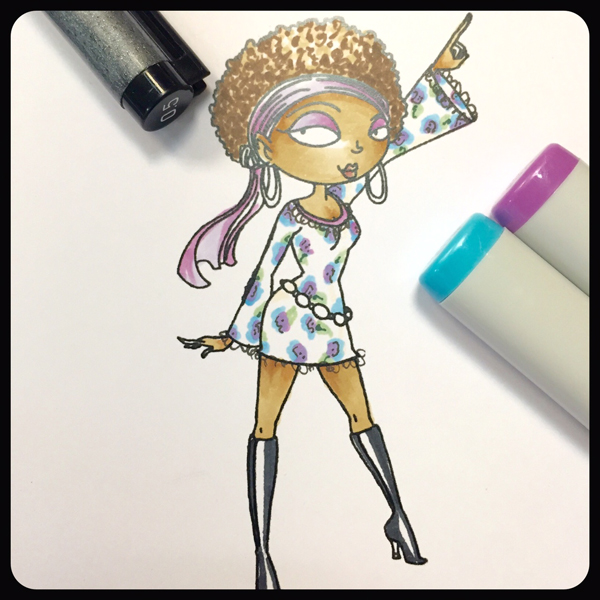
I just finished up a fabulous season of Copic Certification classes in Des Moines and arrived home a few minutes ago! I love our Copic classes…always full of fun people who are eager to learn more about many aspects of coloring…both in general and with Copic Marker!

Our teaching team is moving into Copic Workshop mode for late summer and fall: Faces and Hair, Values and Monotones and Dress for Success. You can see a list of classes and locations that we have scheduled for the rest of 2016 here.

Locations that we have coming up in the Fall are

  • San Diego
  • Chicago
  • Dallas
  • Edmonton, Alberta
  • Sacramento
  • Las Vegas
  • Charlotte, NC
  • Portland, OR
  • Hanover, MD

Make sure you are always in the know when we’re coming to your area with fun classes by receiving our informative newsletter. You can subscribe by scrolling to the bottom of this page and entering your email address.

To celebrate our upcoming workshops, I’m giving away TEN Copic t-shirts to 10 lucky blog commenters and/or Facebook friends. To be entered to win here, leave a comment here on this post… What is the number one skill that you want to improve upon while coloring with Copic or any medium!? 

I’ll select TEN winners on Saturday, June 11th!

For other chances to win, visit these ROCKSTARS:

Thanks for stopping by! Good luck!

Color My World? Yes, please!

Color My World Full Lori Craig_5877

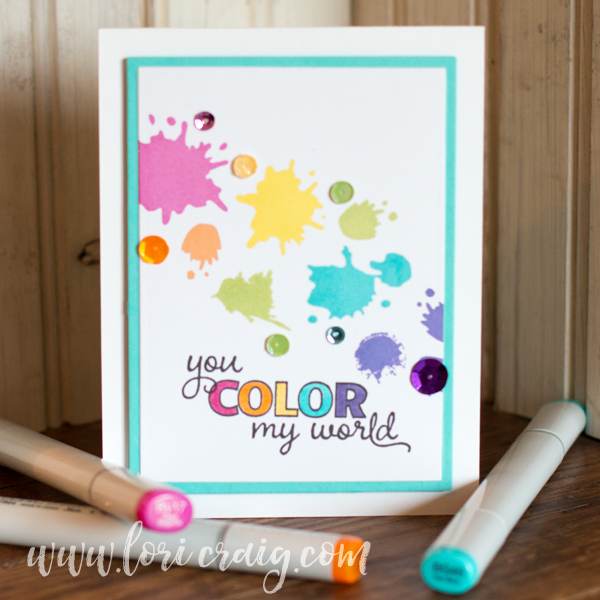
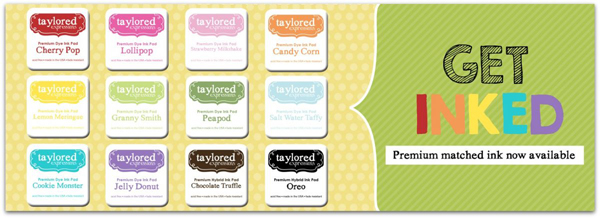
Color My World! Yes! Extra colorful excitement around here today as I have an opportunity to share beautiful new Premium Matched Inks from Taylored Expressions. TWELVE rich colors in full size ink pads or 1″ cubes that coordinate perfectly with Taylor’s Premium Cardstock. Swoon!

I have been using a lot of bright and bold colors lately, and these certainly spark the creativity!  The Chocolate Truffle and Oreo Hybrid inks offer a nice smooth, dark coverage that dry quickly, and worked well with Copic Markers. The other ten dye inks are fast-drying, fade resistant, archival safe, and offers superior coverage. Let me repeat two words again: superior coverage.

GetInked-600x218

The colors are almost as fun to say as they are to play with. Super sweet, and totally Taylor! … cherry pop, lollipop, strawberry slush, candy corn, lemon meringue, granny smith, peapod, cotton candy, cookie monster and jelly bean! 

Color My World Lori Craig_5880

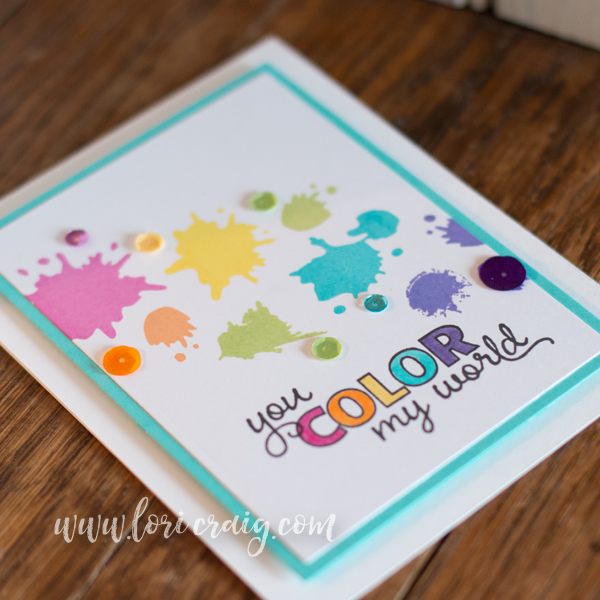
I made two cards to share with you today! The first one “you color my world” showcases splotches from Stroke of Genius 1 and 2 with the colors Strawberry Milkshake, Candy Corn, Lemon Meringue, Granny Smith, Cookie Monster and Jelly Bean! I paired the color splash with a sentiment from the set A Life She Loved and Copic Markers (RV17, YR04, Y15, BG45 and V17). I finished it off with a smattering of sequins from random packages in my stash!

Have Hope Lori Craig 5864

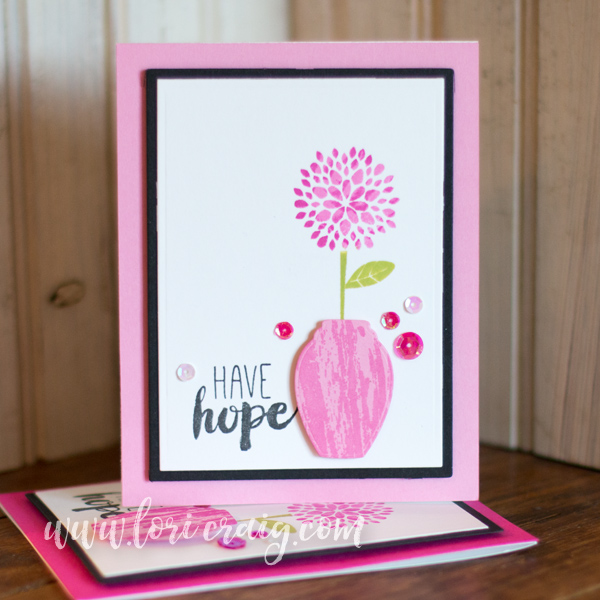
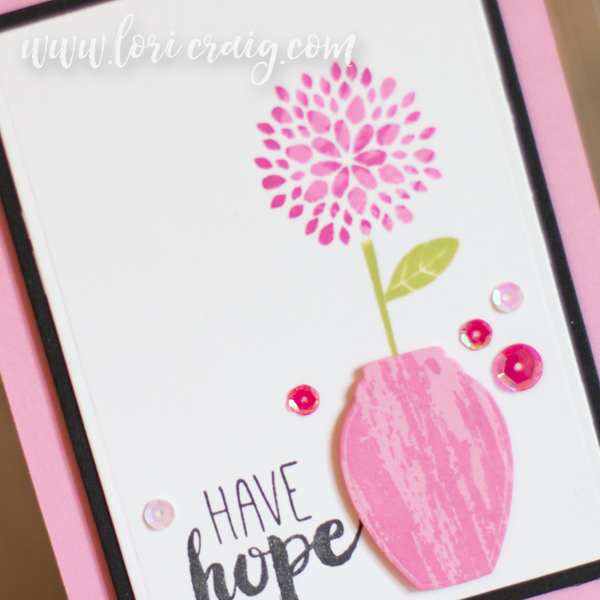
My next card was fast and fun! I used a super old stamping technique called Rock ‘n Roll (tutorial found HERE at Splitcoaststampers) that allows for multiple colors of ink in a single impression on solid image stamps. I used a single stem floral from Posh Posies inked first in Strawberry Milkshake Premium Ink and then rolled in Lollipop Premium Ink while the stamp was affixed to the lid of my MISTI Stamp Positioner. By keeping the stamp on the MISTI, I was able to stamp the floral bloom and clean my stamp before inking the stem in Granny Smith Premium Ink and pressing to the white cardstock for a crisp clean impression.

Have Hope Close Lori Craig_5865

Next, I cut my Various Vase die from Strawberry Milkshake cardstock and stamped with a texture from the Stroke of Genius 2 stamp set in Lollipop Premium Ink. The sentiment is from a sweet small set called Free Spirit! The focal image layer is popped up on Strawberry Milkshake cardstock.

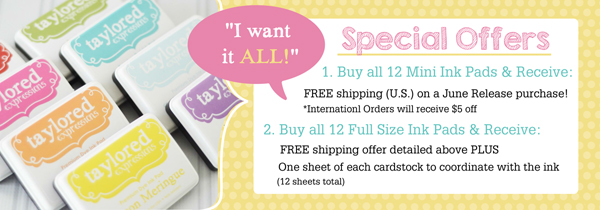
I really hope you’ve enjoyed my introduction to these made in the USA Premium Inks from Taylored Expressions! They are now available and you can only find them at the TE webstore. Plus, check out the two I Want It All to celebrate the arrival of the newest products!

Be sure to leave me some love in comment form below because Taylor will be choosing a lucky visitor from the blog post comments to win a choice of 6 colors of full size pads and coordinating refills! 

TEInk-launchspecials

I’ll have more to share soon! Today, I’m teaching Copic Marker Certifications in The Taylored Expressions Studio in Ankeny, Iowa – of all places! How fun is that! I’m going to sneak over to the warehouse on my lunch break and just oogle at all of the stacks of ROYGBIV!

Thanks for stopping by! See you soon!

Play Favorites – Create Your Own Copic Marker Set

life she loved lori craig IMG_5907

We have just returned home from an extended family weekend and seeing an incredible, history-making baseball game at the KC Royals stadium on Saturday! Summer on-the-go also means I need my favorite Copic Markers in a grab and go pouch – small, easily portable and yet still representative of the rainbow!

One of the most frequent questions I’m asked as I travel and teach is “what set of markers should I buy?” Or, the close cousin question, “what colors do I buy first!?” And, that internet friends is as personal as, “do you want mayo, mustard or ketchup on your Sonic #1 cheeseburger!”

There is a lot of thought that goes into pre-selected Copic Marker sets that either Imagination International (your North American distributor of Copic Marker) or some of your favorite retailers have created, but sets aren’t the be-all-end-all for many of us!

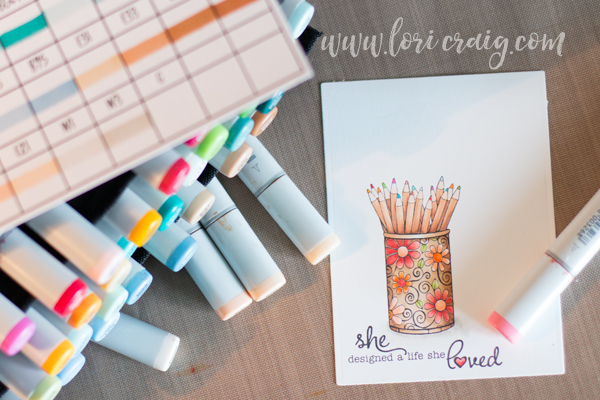
Today, I’m going to give you a peek at how I’ve selected my personal favorite ala carte colors for a travel pouch of markers that I keep ready to roll all of the time. (colored pencil image – When Your Heart Speaks – Taylored Expressions)
traveling colors lori craigIMG_5893

If I’m traveling to teach, I have specific teaching sets that I use. The colors in these sets are put together around specific images that we use to teach specific concepts in our classes, so they are heavy on shades of green and earthtones, more limited in vibrant pinks, blue greens and yellows… they are great for teaching, but not my own personal style. And, that is the problem with almost any pre-made set – you won’t love 100% of the colors represented – and with a tool like Copic, you should have the colors you LOVE first!

If I’m coloring for pleasure, I am usually doodling on a sketch pad with a Multi-liner or coloring cute and whimsy, so break it down to a simple ROYGBIV and my favorite hues. My travel set is not a collection of or representative of anything other than my favorite colors – which is how I suggest people start building their own collections:

FAVORITE COLORS that you’ll use on the type of images you love. 
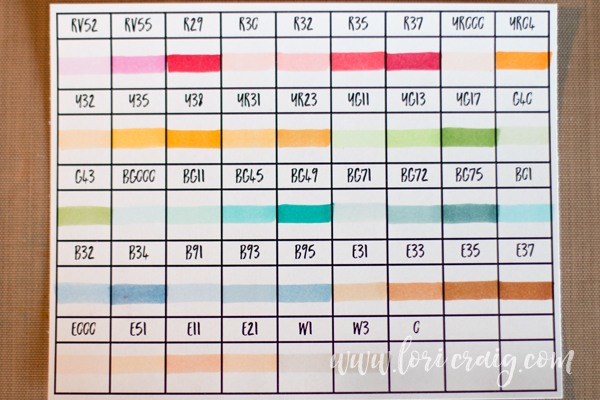
traveling colors lori craig IMG_5909

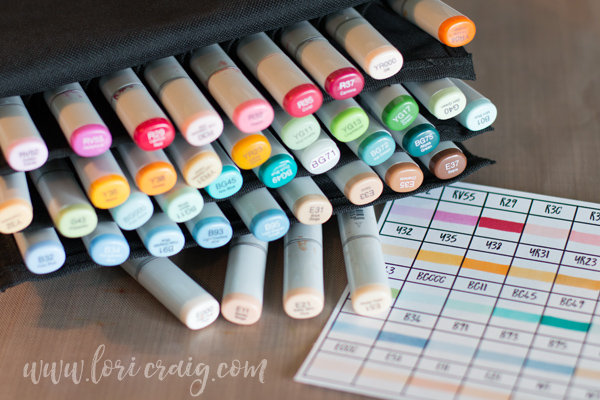
I use a 36-piece wallet because it’s small enough to tuck into my purse. (To use at home, these 36-piece empty cases work great! They are inexpensive and stand upright.) 36 colors represent about 10% of the Copic color line, so I have to be selective and there is only room for colors I really love. (And, I switch this up from time to time!)

When I say my favorites – I mean just that – my own personal favorites. I have a small selection of greens and browns for flower stems and nature, and then some more vibrant pinks, coral reds, yellows and lots of blue/greens.  You might notice that my ROYGBIV is absent of any V. I reach for violet very rarely, so there isn’t real estate in my pouch for purple. Sad to some of you, but true for me.

I started this collection by taking a look at colors I am drawn to across the rainbow. It is very helpful to see these colors in person, so a trip to a paper crafting or  fine art store that carries the Copic line may be helpful so that you can see the hues in true, natural light.
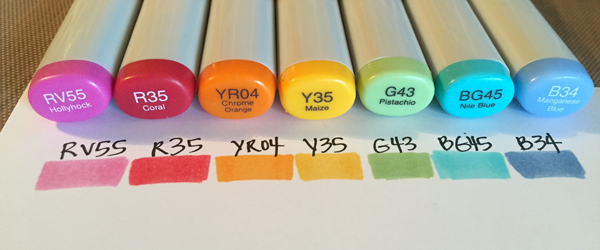
roygbi

RV55 • R35 • Y35 • YG17 • G43 • BG45 • BG72 • B34

Notice that most of these colors end in a 4 or 5 – the last number indicates the value – how light or dark the shade is on paper. These are bright and vibrant colors, but unless I am coloring flat images – no shading, no contrast, no depth or dimension – I need shading options. For each of these colors I looked to the Copic Color Chart for a natural blending partner. A natural blending partner will share the same first letter (hue) and the same first number (saturation… or gray) – but the last number (value – how light or dark) will change. Look one or two colors in either direction of your favorite for natural blending partners.

In many places around my favorites I have room to include a lighter and darker shade in my kit, but in some places I only have room for one blending partner (G43, for example) and in that case I recommend that you more often lean to the lighter blending partner (G40). There are multiple ways to create darker shading with gray or another color family. In this set, I could use BG75 or maybe one of the E30s to shade G43 using a few different blending methods.  (We teach this concept in depth in our Intermediate Certification class.)

faces and gray IMG_5909

If you are counting markers in my favorite set, you’ll see this bottom row (pictured above) of colors makes for more than 36-colors in my wallet. I don’t take up room in my wallet for a simple skin color combination, two light grays or a colorless blender. I rarely color people on-the-go, so I do not need a lot of skin tone options. These seven markers are tucked into the zippered pocket on the back pouch of my Copic wallet so that I have them when I need them, but they do not take up precious slots.
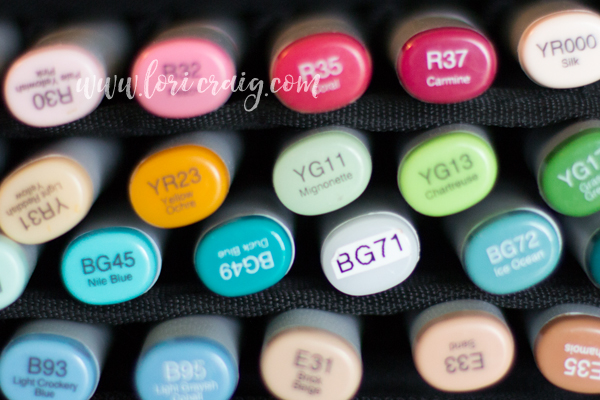
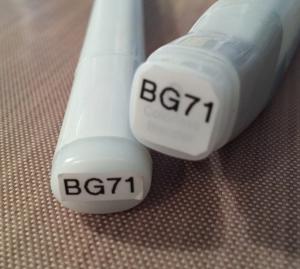
bg71 lori craig IMG_5900

You may have noticed this tacky label for a BG71 color in my favorites – and it may or may not have occurred to you that Copic does not make a BG71 color.
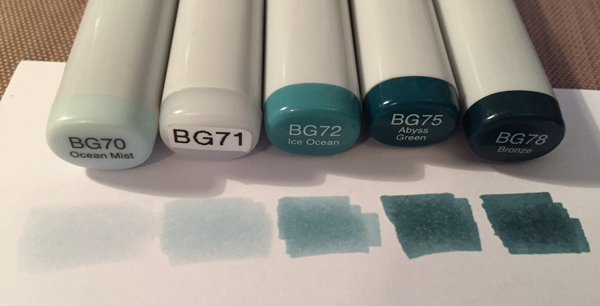
BG70s

The BG72/BG75 color combination has always been a favorite of mine, and long before BG70 was introduced a few years ago, I needed a lighter shade that would allow me to blend from BG72 toward highlight.
bg71

Using Various Refill for BG72 and BG000 – I created my own custom color that I called BG71 in an empty Various Refill container and adding to an Empty Sketch Marker. I have several colors that I’ve created for my own personal preference, and I suggest mixing those colors in the refill bottle and then filling the empty marker – this keeps your color formula consistent in the barrel of the marker as you refill. This is how I’ve ended up with BG71 in my favorite 36!

traveling colors lori craig IMG_5909

After you’ve created your own personal kits – keep a filled in color chart and the Copic color chart handy so that you can be intentional about where you add colors when the opportunity arises. Empty Copic color charts and the complete Copic color chart and wheel are available as free download resources!

life she loved lori craig IMG_5907

I hope this gives you some confidence to look at building your own set or collection:

  • Look for colors you love and build with balance.
  • Add blending partners (same hue and first number) to your favorites – leaning toward a lighter partner if you can’t add both light and dark.
  • Keep a blank color chart and a color wheel handy to look at how you would change your look and add new colors intentionally.

I have a busy week ahead, and I’m wrapping up our Copic certification classes for the year in Des Moines this weekend! After this weekend, I’ll move to teaching workshops for the rest of 2016. Come and see me!
Meet Mr. Walker – Coloring Dogs with Copic

Copic Dogs Lori Craig Full Card

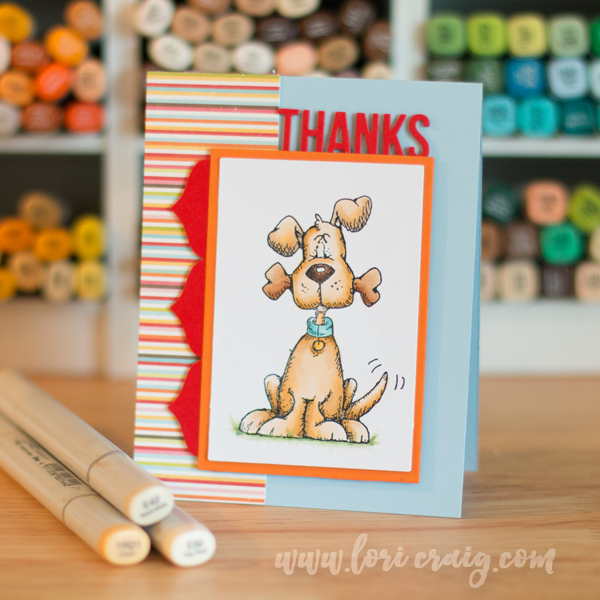
Coloring four-legged fur-babies with Copic Marker today and sending a thank you card to my sweet neighbors who watch my dog like a hawk when I run errands or am out of town!

craig dog


This is Mr. Walker. He is 10 years old. He loves to romp in the tall grass, hunt ducks and retrieve his plastic throw dummy. He also likes it when you rub under his chin or right between his huge floppy ears.


Copic Dogs Lori Craig

This stamped image from Whipper Snapper was one of the very first stamps that I ever colored with Copic Marker years ago (you can see that card here), and while many stamps are re-gifted or thrifted over time around here, this one so sweet for lab lovers like us that I’ve never been able to purge it from my collection.  The stamped is called Harry the Dog, but it looks like he is retired.

Coloring our pets can be a challenge, but it’s easier with the Coloring Cats and Dogs with Copic – written by Marianne Walker. The book is great for beginner or intermediate artist who want to improve their Copic techniques. It will teach you how to smoothly color, blend, add texture, and create fur in a variety of lengths.

Copic Dogs Lori Craig Full Card

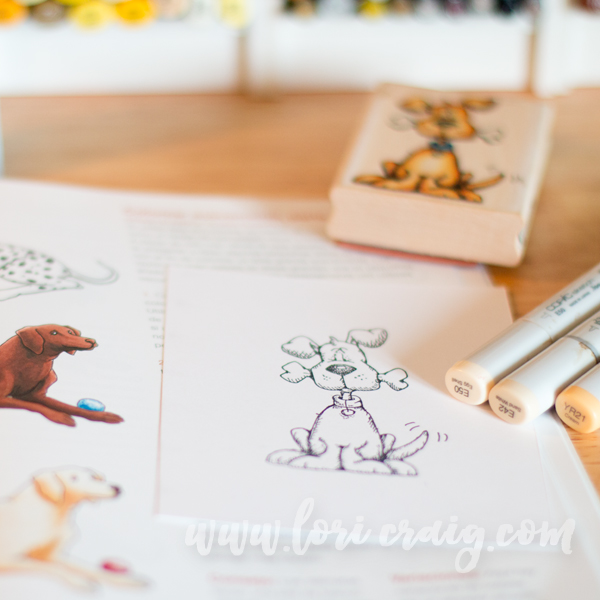
To color Walker on this card, I was able to use a recommended blending trio right from the book – E50 for the base and shading with E42, YR21 and YR23.

Tip: The Copic Coloring Number system with a graduation of saturation (gray) and value (light and dark) doesn’t apply number-by-number in the earthtone markers. You may find yourself using colors from a wider series of numbers – don’t let that alarm or worry you.

Here, I used the E50 for a creamy undertone and E42 for light shading, then brought in more of Walker’s golden/red coloring with YR21 and YR23 sparingly.

The Coloring Cats and Dogs with Copic Marker book is a nice resource with a great variety of popular pet breeds represented with step out photos and suggested color combinations. There are also line art pages that you can practice coloring step-by-step with the book.

Speaking of Walker, he needs brunch, so I better run! I’ll be back tomorrow with something fun!

Thanks for stopping by! Have a GREAT day!

You Were Made for Amazing Things

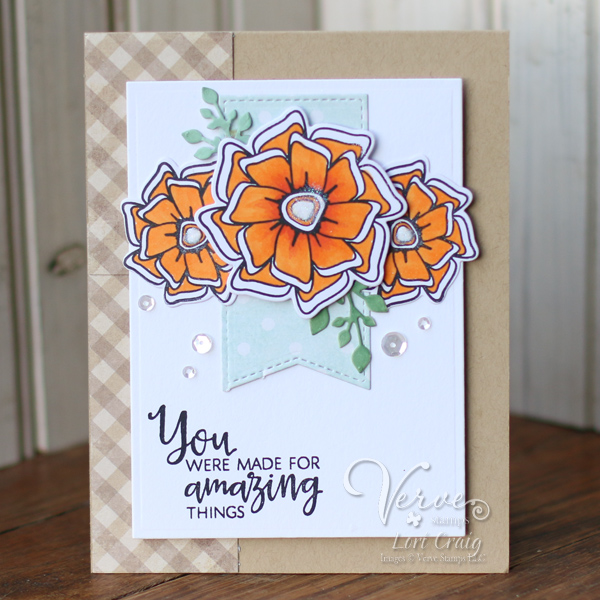
Verve_May2016_Lori Craig_1370

Welcome back to Day 3 of Verve’s May Spotlight Hops!  It’s Verve‘s Release Day, 2 new stamp sets, 3 die sets and a beautiful sequin mix are all available in the store.

Verve May2016 Spotlight


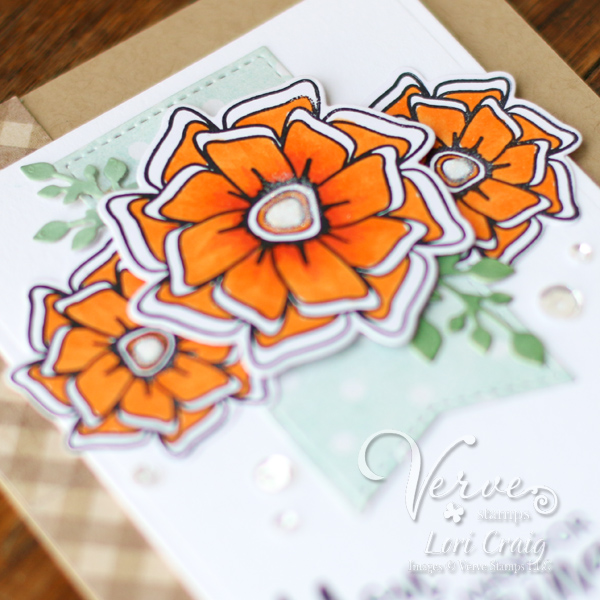
The blog hop theme today is designer’s choice! You didn’t think I could let this series go by without a single stitch of kraft cardstock did you??? Swoon for more beautiful sentiments in Julee’s Beautiful Things stamp set and Beautiful Flowers Die.


Verve_May2016_Lori Craig_1373

Here I’ve paired them with the Stitched Pennants Die Set, leaves from the Beautiful Flowers die set and my most favorite white sequins – Shine Bright Sequin Mix. It’s like looking at a pouch of sparkling star dust. Love.

I colored my flowers on X-Press It Blending Card (my smooth finish favorite!) with a YR04 Copic Marker and added a little hint of white glitter to the center of the flowers, then popped them up with X-Press It Double Sided Foam Tape for interest!

Verve Sneaky


Want to win some shiny new Verve? Today’s prize is a BIG one. We’ll be picking a random commenter on one of the hop spots below to win our ENTIRE new release! So be sure to leave a little comment on all the blogs below to increase your chances! Check out the Verve Blog today for the full hop list and all the prize info and deadlines!


Beautiful Things Beautiful Flowers Die Set Stitched Pennants Die Set
Love Everlasting Everlasting Heart Die Set Copper Blush Sequin Mix


Here’s your full hop list of inspiration!


Day 2 Hop List
1. Julee 7. Lesley
2. Lori {guest} 8. LauraJane {guest}
3. Betty 9. Marisa
4. Charmaine 10. Maureen
5. Christyne 11. Stacey
6. Laurie

I can’t wait to take a peek at the work from the other Verve girls today. I love the stamps, I have really enjoyed working with them. Many, many thanks to Julee for asking me to participate this month. It has been a true honor.

I still have more to share over the next week or so from this release, but I’m still this morning I’m still folding Yosemite laundry… <blech>

I hope you’ve enjoyed my projects and that you are inspired to make beautiful things!  

Thanks for stopping by!