Category Archives: Imagination International

Christmas Delivery

Christmas Delivery full lori craig

I have two more Christmas cards to share with you today! I am getting excited for the Christmas holidays. I love the time with my family, and the laid back calendar, but I have several things to tackle between now and the 20th for that to happen… don’t we all? 🙂

Special Delivery upclose

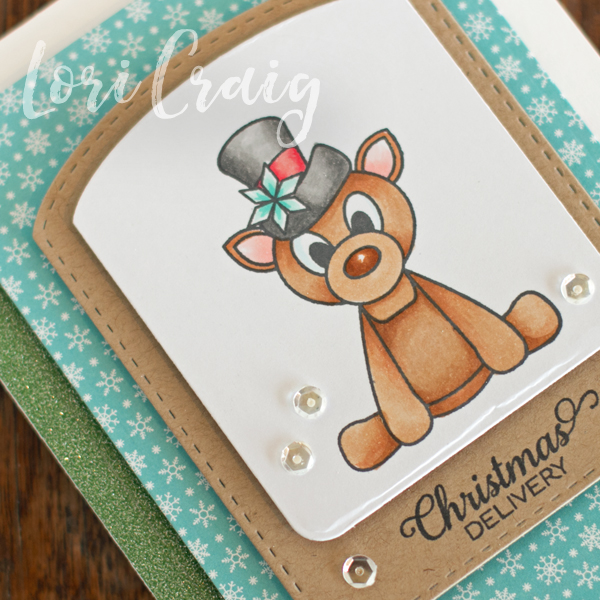
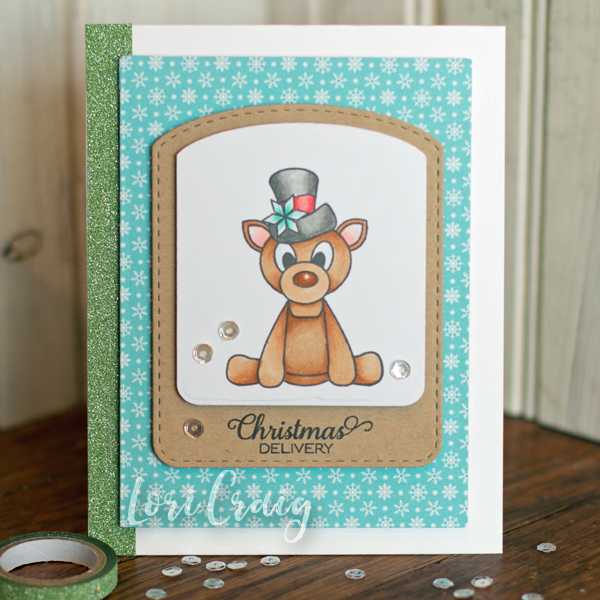
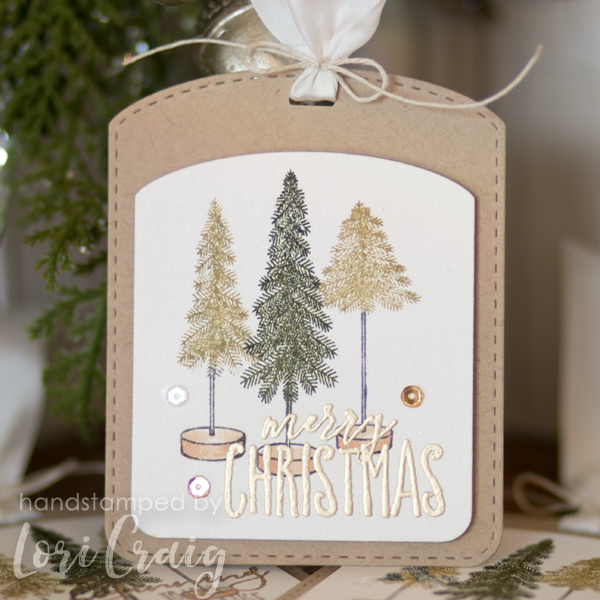
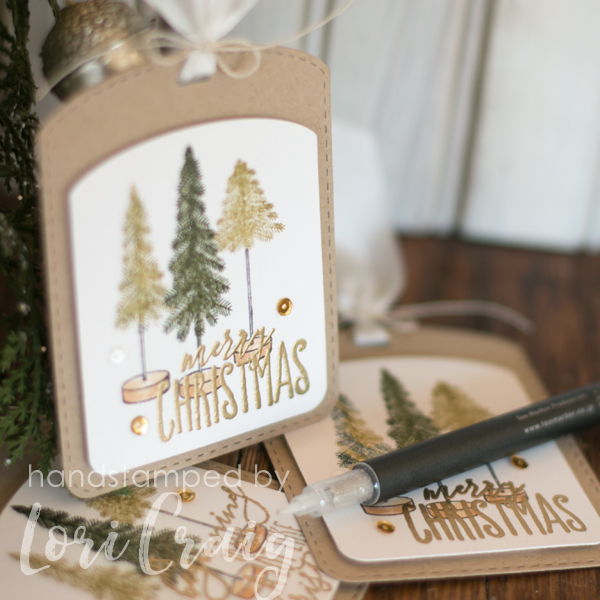
This cute stamp is one I’ve loved from Verve for several years. Such a cute image to color! I used colors from my favorite custom Copic set (you can see the color list here!) to color my reindeer and then cut my pieces with Taylored Expressions Build-a-Tag 4.

When I had my general layout done, I added some pizazz with XPress It Deco Green Glitter Tape.  I really like using this tape for a few reasons: 1) It sticks… sounds crazy, but some don’t, and I’ve had good luck with this! 2) It is easy to apply, it doesn’t wrinkle or stick so tight to anything other than your paper – the application is smooth and bubble free. 3) It is smooth to the touch. You’d think with the shimmer and shine this has that the feel would be chunky and scratchy – it’s super smooth. 4) It is super easy to lay rows of the thinner tape next to each other without visible seams – this is two pieces of the green glitter tape side-by-side.

happy holidays close

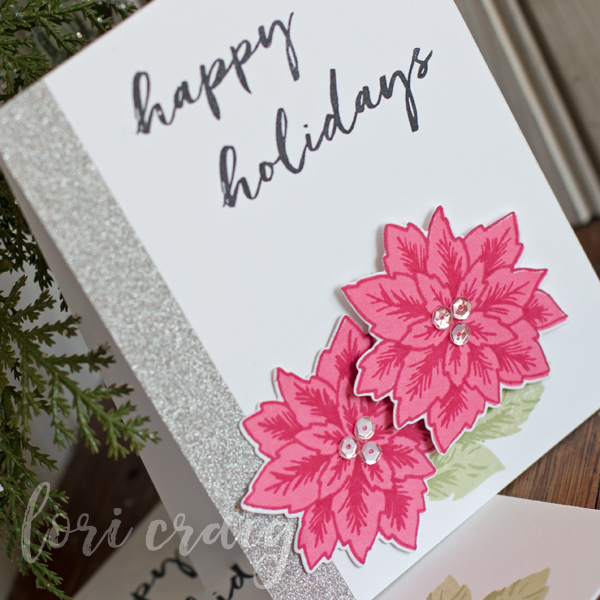
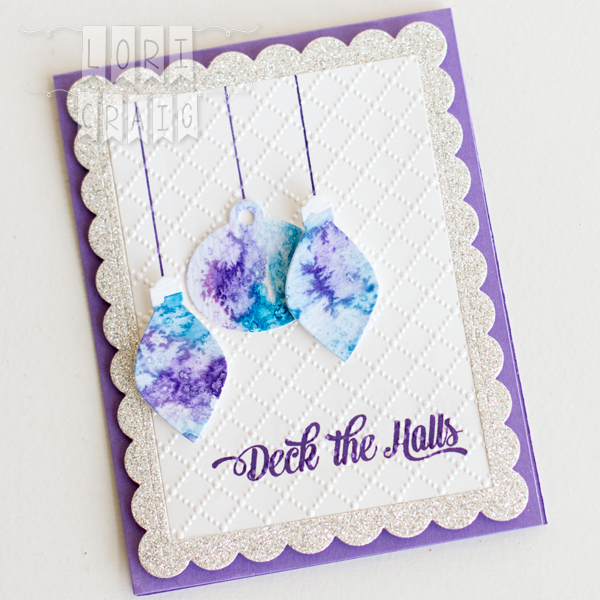
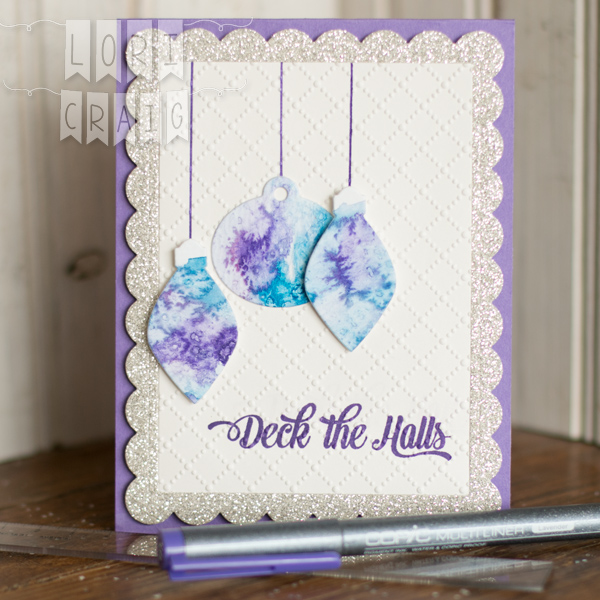
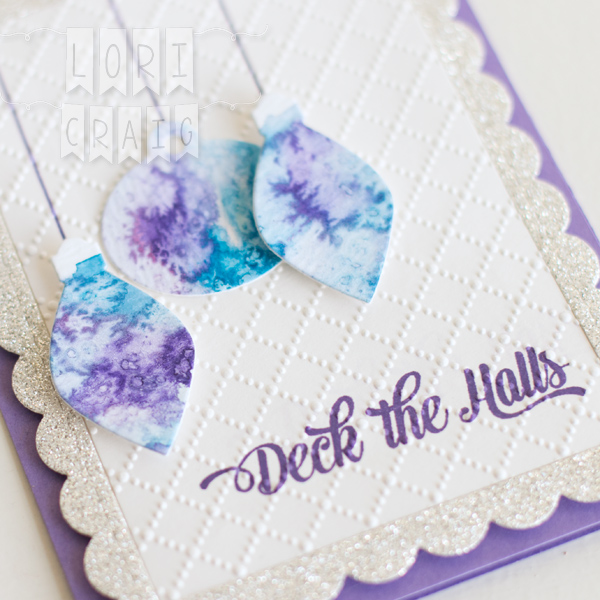
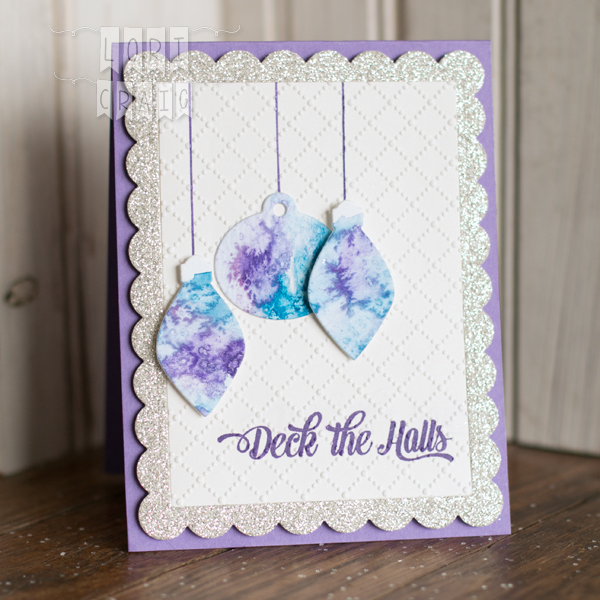
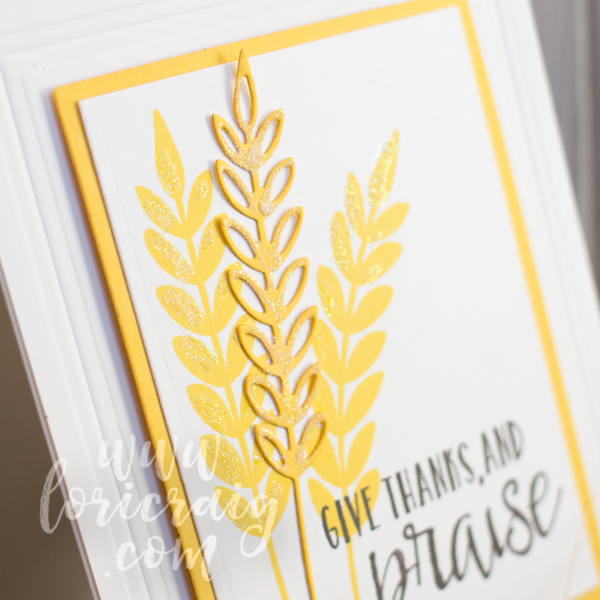
This next card is one that I started at my stamping retreat in October…The design was a swap from the uber-talented Tracy McNeeley I stamped the elements at our retreat and then came home to finish assembly. The poinsettias are from Birch Press. Stamped and then die cut… These were super easy for me to line up – and with my MISTI, I was able to make several flowers without any trouble. The die cut flower pieces are popped up for dimension with XPress-It Double Sided Foam Tape.

happy holidays full lori craig

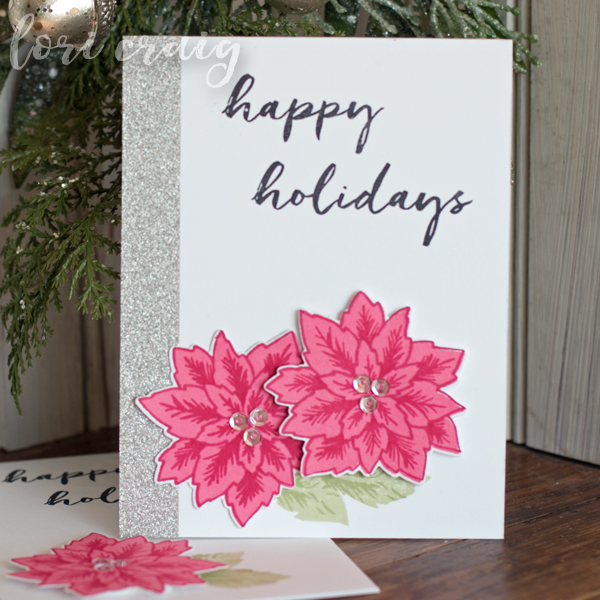
I have accented the left side of my card with silver Deco Glitter Tape from XPress-It. This comes in a wide 1″ roll, and I LOVE it! It has the same features that I like about the skinnier tapes, but it cuts like butter – even with scissor. I trimmed the far left edge of this glitter tape with scissor after applying to my card front. Nice, clean and straight cut… So easy…

I’m off to the phone store. Both of my girls needed new phones so I can reach them when I want to talk to them. So, in the spirit of nothing is ever fair, I got an upgrade and we played the hand-me-down phone swap-a-roo.  I detest the phone store, so if I’m not back in a day or two… give me a shout. Make sure I survived!

Thanks for stopping by!

Sparkly Christmas Tree Tags


sparkly tree tag lori craig square

I’ve started making my Christmas tags… even when I do not take time to stamp all of my Christmas cards, I like to make a lot of tags. I keep my wrapping fairly simple with solid or minimal pattern papers and add a hand stamped tag!

At a stamping retreat in October, I received the Take a Bough bundle from Concord & 9th as a door prize! (Thanks Greg and Angie!) Loved all of the elements to the set! I’m planning to have my girls help me make some of the dimensional trees, but today, I used the O Christmas Tree stamps for making a few cards!

sparkly tree side view lori craig

I stamped my trees with waterbased green inks for the tree branches and used Tsukineko Espresso Truffle on the trunks. The bases are colored with Copic Markers (E31/E33) and then the branches are accented with Clear and Green atyouSpica Glitter Pen. I love the shimmer that the glitter pens add without any bulk or thickness to my project! The sentiment is embossed with Ranger Princess Gold Embossing Powder.  I love that this gold isn’t so brassy…

Spica-Clear

The Spica glitter pens come in 24 different colors, and they are available in multiple set options or as individual pens. The micro-glass flakes in atyouSpica glitter pens are more reflective and brilliant than the glass beads typically used other glitter pen brands.

The pens are archival, non-toxic, acid-free, no-clog nib and pigment-based. I use them most often, just like I did on these tags, layered over color for extra shine. My stamping ink held tight with no running or smearing!

Calendar Pages

One other way I love to use these pens is in my calendar. I don’t do a lot of fancy work in my day-to-day planner, but I still love paper and I like it colorful. The Spica Pens add a little bit of shimmer without bleeding through to the backside of my pages. You should be able to click and enlarge the photo. 🙂

sparkly tree tag lori craig square

So that’s three tags down… About 2 dozen more to go! I do love Christmas crafting, and while I promise myself I’m going to do a little bit here and there through the year, I just can’t get into swing until the holidays actually roll around! I hope you are finding time to get crafty! See you soon!

Deck the Halls in Lavender

full deck the halls white lori craig

Today I am sharing one of my last few cards for the SCS Falliday Fest! This was for Lydia’s challenge to create Melted Snow – watercolor and salt background! Also showing you a fun new product from Copic, the Lavender Multiliner. How fun!

We have had a Salted Backgroung tutorial in the Splitcoaststampers library for years, and trying the technique was an assignment for me in a recent watercolor class that I participated in, as well. Way past time that I tried it! It was easy, and I love how it turned out!

deck the halls lori craig

I used Winsor Newton Cotman Watercolors – Purple Lake and Manganese Blue. I painted both on watercolor cardstock, leaving a bit of excess water on the surface and then sprinkled liberally with coarse sea salt. Allow the cardstock to dry and the salt will absorb and shift the color around on your paper. You can use a heat tool to speed this process up, but I’m a fan of allowing for natural dry time when I can!

I had been so wrapped up in the technique, I decided to follow Lydia’s inspiration and go the Christmas ornament route. I cut my bulbs from a retired die set from Taylored Expressions.

deck the halls lori craig full

I “hung” my ornaments with string I drew in with a new Lavender Copic Multiliner. They arrived a few weeks ago, and I love the rich purple color.  As you would expect with a Multiliner, the ink from these pens will hold tight with Copic and water when they are dry on the paper.

IMG_1803Here, I’ve just dropped a few lines of string in to hold my ornaments. You could totally free-hand the lines of the ornaments, but here, I wanted crisp, straight lines for the string, so I’ve used a small clear ruler from Aristo. I keep two of these in my stash. Love that I can tuck them into a pencil pouch and that they are clear to see my work underneath. lavender set


The Lavender Multiliners for drawing, sketching and coloring over are available in four tip sizes: 0.03, 0.05, 0.1, 0.3, & 0.5mm. Pen sizes are embossed on the caps for durability. Available as single pen purchases and in this set of four.

  • deck the halls sentiment

I wanted texture to my white layer, and I also did not want to add a sentiment tag. So, the Deck the Halls sentiment (retired MFT) was stamped in Grape Jelly ink (Taylored Expressions) and then my panel as run through the Big Shot between the Dotted Lattice folder. I love how it embossed right over the top of the sentiment without distorting the words.

I added the bulbs with XPress It Foam Tape to my white panel.The glittery frame (glitter paper from Stampin’ Up! – a gift from Lydia!) is from the Taylored Expressions die set – Frame in Frame 2.

deck the halls full no ml lori craig

I appreciate you stopping by… I know it’s Halloween, but it will be time to Deck the Halls before you know it! Have a great day!

No Tricks, Just Treats – and great Copic inspiration

FullSizeRender (9)Falliday Fest Lori Craig

Last week I was really blessed by spending time at a retreat of paper crafters! This *adorable* Copic colored card was designed and shared as a swap with our group by the beautiful Linda Nomura. Is this a winning clean-and-simple design, or WHAT?

I’d met Linda several times in my Copic classes in the Southern California area. She is such a doll, and I’m glad she made the trip to Kansas to get crafty with me! And, I adore her card with the cute Happy Howloween Lawn Fawn images! 
Copic-logo-200x200

Speaking of treats… a GREAT way to receive quality and relevant Copic inspiration is to receive the Imagination International newsletter! Timely topics, inspiring projects, art work, tutorials, class opportunities in locations near you about Copic from people who LOVE art! Never hurts to be in the know … Imagination International is the North American distributor of Copic Marker and other quality brands of fine art and paper crafting supplies.

Visit Copic HERE and start receiving their inspirational goodness. You might even see fun stuff from yours truly! 😉

Have a GREAT day! 

I’ve Taken a Viking…


taken a viking lori craig final

We lived in Marshall, MO for 10 years and moved back to Kansas in late 2014 leaving good friends who’d become like family. One of the many things we loved about Marshall was the sense of community spirit and the support for Missouri Valley College – home of the Vikings! We are friends with so many who have close ties to the school, and we have a lot of very fun Viking memories.

So when I found this adorable Viking image and die from Avery Elle, I knew it would be fun. My card is in orange and purple – MVC colors, and I may have to make a few more so I can share the viking… I mean love! Isn’t he adorable?  Super fun to color!

SHADBOOK

If you have questions about shading and making images pop,  regardless of color medium you use, you’ll appreciate a stroll through the pages of a small resource that I’ve referenced for several years, Shadows & Shading written by Marianne Walker. This is easy to read and comprehend with great illustrations in a pocket-sized guide. It is a great resource for light source and shading. It’s been super helpful to me, even on more simple line art images like Viking. It covers topics like:

  • Understand different kinds of light sources
  • The difference between shading & cast shadows
  • How to properly color a variety of objects, from simple to complex
  • Shadow color theory

taken a viking close lori craig final

My Viking is colored with Copic Marker – the oranges are YR000, YR04 and YR18 and the purples are V12, V04, V17. Notice I’ve used markers outside of a natural blending group – meaning there is a change in saturation (gray) from one color to the next. This is one of the topics covered in the Shadows and Shading book. My mountains were cut with Stitched Mountain Borders from Lawn Fawn. Super fun!


Along with resources like the Copic Shadows and Shading book, Copic classes are an excellent place to learn more about using Copic – hands on coloring, instruction and feedback on your work. We have a few workshops left for 2016 (Boston, Portland, DC area, Dallas) and our 2017 CHA schedule for Phoenix classes in January are open for registration!

Busy Saturday celebrating our community fall festival, school plays and continued home projects! I hope you have a fabulous weekend! Thanks for stopping by!

Give Thanks and Praise

wheat full lori craig

Always feels great to be stamping and creating, don’t you think? We are in the middle of several home projects, but I snuck into the stamp studio yesterday. I had this new wheat themed stamp set called Give Thanks from Concord & 9th on my desk. I’ve seen a lot of beautiful fall themed projects done with this set, but here in the bread basket – wheat is a year around thought. Fun fact: Midwest winter wheat is sewn in the fall and harvested by mid-June.

glue marker lori craig

I felt like my wheat deserved to be glittered up…and I grabbed a X-Press It Glue Marker from Imagination International (I used a medium nib on the left, but love that it comes in a pen tip and wide nib, too!) to add microfine clear glitter to the head of my wheat shocks.  The shocks truly do glisten in the sunshine…

glittered wheat lori craig

I like that the glue marker nib does not leave impressions in my paper or lines of missed coverage. The glue is acid-free, non-toxic, dries clear and best of all (in my opinion) is that it can be both a temporary (like a sticky note it if dries unattached to another piece of paper) or a permanent bond. Good stuff!

thanks praise lori craig

My sentiment comes from a set that the sweet Jen del Muro, owner of Reverse Confetti, gave to me when I had dinner with her in Dallas last month! Love the mix of fonts here. The full set has some beautiful sentiments. It’s called Walk by Faith.

I have several new wheat sets on my desk from various places, so I’ll be playing in the days to come! Thanks for stopping by! Give thanks and praise!

I Believe in You & Beta Testing Fun

DTGD16susieaustralia Lori Craig

Here’s a little mid-week happy for you! I fell in love with this adorable Be a Unicorn from Avery Elle. Quick and cute…  with Copic Marker!

unicorn close

My little unicorn is colored with BG000 and BG11 – his little horn is RV02 and RV04. I added some sequin stars… done.

III logo

Do you know what else is quick and easy? Signing up to be a beta tester for the new Copic Studii!o Ap that is coming soon. 🙂 Imagination International, Inc. is seeking beta testers for their new Studii!o app that will help manage marker collections and allow you to connect with other artists. Start HERE with a few quick questions (or click the graphic above!)


My Watercolor Wheel and Tools of the Trade

Color Theory Lori Craig

As we’ve been winding down the summer and getting both of my girls settled into high school for the year, I’ve been hitting the books myself! I’m currently watching a FABULOUS watercolor class being taught by my friend, Michelle Wooderson called Close to Home A Watercolor Landscape Journey.

kinsale watercolor

In anticipation of this class, I did take a little Winsor Newton travel palette on vacation earlier this month.  I thoroughly enjoyed sitting on the dock at my father-in-law’s home on the Chesapeake Bay and painting the day away… There is something so peaceful about being outside. I was happy with the trees… I’ve much to learn regarding water and sky…

Thus far, I feel like I am learning what I thought I wanted to know.  I highly recommend Michelle’s comfortable teaching style and the way she lays out her information.

cattle pen sketch lori craig

As I’m delving into the painting process, first, I wanted to show you the start of another painting…  On the left is a small sketch that I used to layout value on my final image and color selection before I start painting – I used an Aristo .5mm Mechanical Pencil and Aristo Click Eraser from Imagination International. Great tools for your desk or a small travel bag!

I’d love to get outside this weekend with my sketchbook, but I started this freehand from a photo that I took of the beautiful Kansas Flint Hills, not far from my home. Eventually I’ll paint the larger sketch above on the right.

value scale sketch lori craig

The mechanical pencil was great for adding value in my small sketch – light shading to heavy hatch marks allow me to color map.

You can see a quick Copic Warm Gray value scale on the left… And, it’s helpful in making a color map. This is something I often do with more detailed images when I am coloring with Copic. Once the map is created, you don’t have to think about the “where” and “why”  – if you are interrupted mid-project, you just check your map and go… like driving a car! The Copic class Vintage Value and Monotone workshop or the Intermediate Certification are other great resources to learn more specifically about shading and color value.

ROYGBIV swatches Lori Craig

One of my first colorful tasks was to finish swatching paint samples. I wanted to see if I had color gaps that I {ahem} should fill. It took a few minutes, but I’m thrilled to have swatches of true color that I can use when I’m working to color match … the actual pigment almost NEVER matches the packaging… We all know that!

I’ve started out with Winsor Newton watercolors… They were readily available to me, and a reasonable price point for a newbie. I had some that I purchased for the Watercolor for Card Makers class I took last winter… I did need to add a few tubes. I love the rich colors, and I won’t lie… the fancy silver tubes make me feel like a longtime artist! I’m a sucker for pretty packaging!

color wheel close up


After I selected a rounded color palette with my swatches, we really talked about the color wheel. I painted a large watercolor wheel that I can hang in my studio for reference while I work. This sheet is 10″ x 14″… I love seeing the colors run next to each other… I can’t wait to start painting!


So, what do you want to learn this fall? I’m so grateful that we can always keep learning, growing and stretching. Art is so good for the soul in that regard… Let’s hit the books!

More tomorrow… including a winner for my Concord & 9th giveaway!