Category Archives: Tips & Tutorials

Holiday Blitz

landing-pad-lcraig-103008.jpg

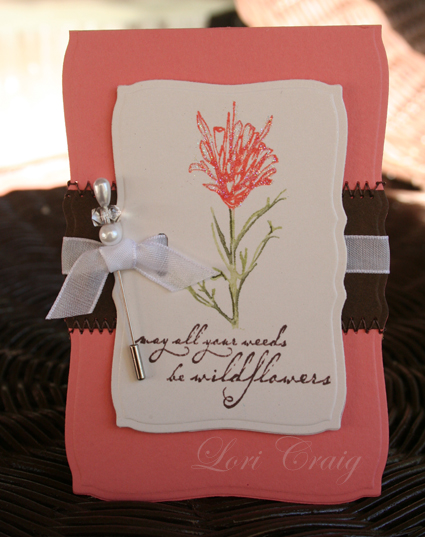
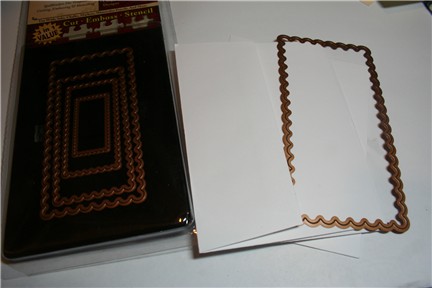
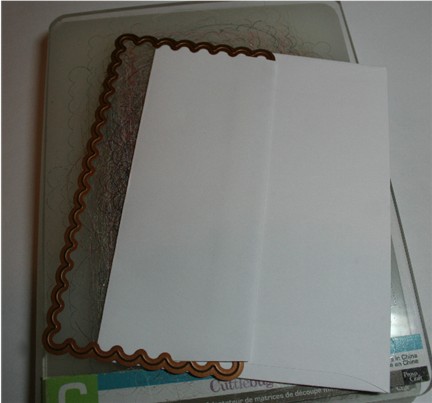
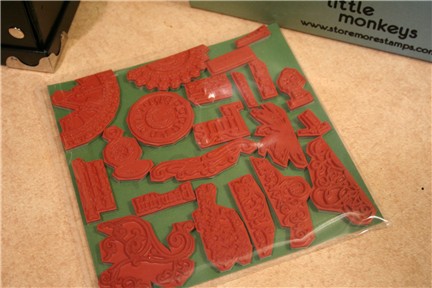
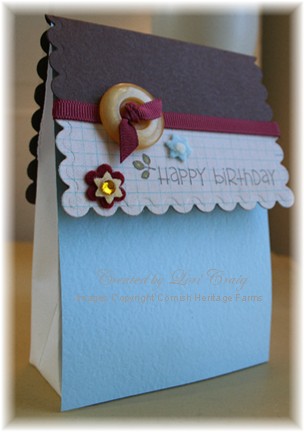
Today kicks off a full week of Holiday Blitz tutorials over at Splitcoaststampers. Beate was kind to ask me to write 2 Nestabilities tutorials for the SCS Resource section that go live today. Nestabilities from Spellbinders are one of my go to tools for quick and easy WOW! Here, I’ve used the Label One die-cut and a Wizard embossing mat for a dry embossed image. See the Embossed Frame tutorial HERE.  You can view the Cutting Shapes tutorial HERE. Other tutorials throughout the week will feature packaging and giftable ideas that you may use throughout the holiday season.

Wizard vs. Cuttlebug

I have been using a Cuttlebug to cut my Nestabilities for the last year, and I get fabulous results. If fact, the Spellbinders dies are universal, and Spellbinders provides a comprehensive list of ‘sandwich’ recipes required to use their dies in other die-cut machines. You can find that list HERE.

That said, I used the Wizard die-cut machine to write these tutorials, and when it comes to the crisp embossed edging that are a Spellbinders trademark, there is NO COMPARISON. The Wizard creates the most beautiful crisp, detailed dry embossed edges. Anyone need a Cuttlebug? 😉

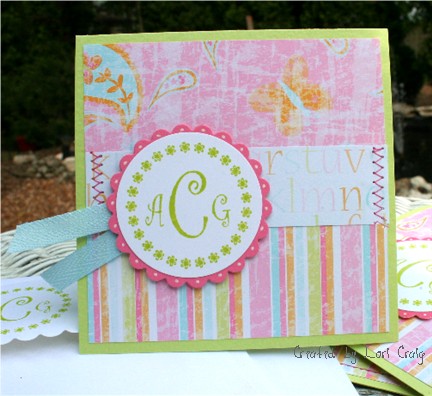
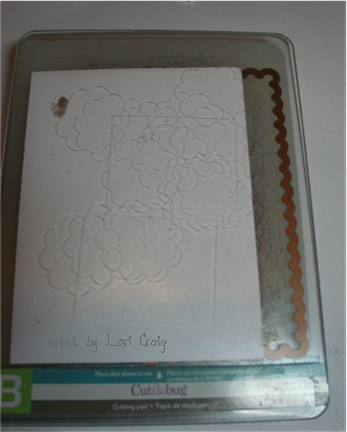
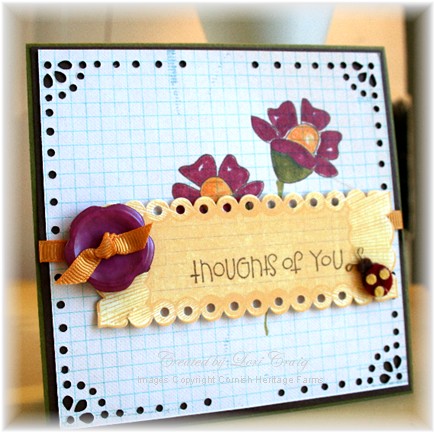
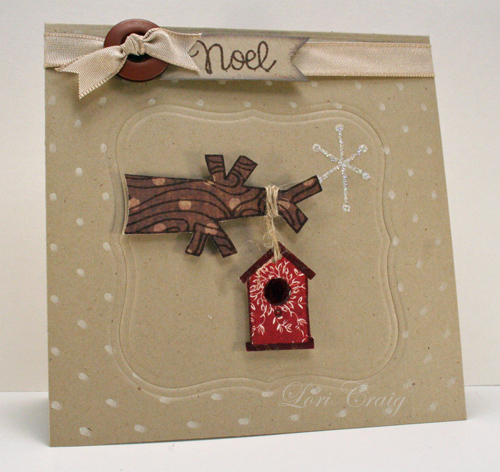
This one layer card would be fairly simple to duplicate in mass. The elements from Kim Hughes’ set ‘The Landing Pad’ are stamped onto patterned paper, cut out and applied to the cardfront with dimensional dots. Tip: I used a Stamp-a-ma-jig to position the birdhouse so that the hole to the house was in the center of my patterned paper wreath. To apply the Pindot background, I simply cut a mask from the Label One die out of notebook paper and placed it over the embossed shape. Then I stamped the Pindot Scrapblock from Cornish Heritage Farms in white pigment ink.

Be sure to check out all the tutorials throughout the week, a new one each day! I’m sure even the most seasoned stamper will find an ah’ ha! moment, some tips and a few tricks tucked into each project.

I’ve got a day full of errands, odds & ends and cleaning here at the Craig house. I’m hoping to sneak a little stamping time in later this afternoon! Have a wonderful weekend!

  • Stamps: Landing Pad – Kim Hughes Collection & Pindot Scrapblock (Cornish Heritage Farms)
  • Cardstrock: Kraft (Prism), Wassail paper (Basic Grey, brown polka dot patterned paper (Prima Marketing)
  • Ink: Espresso & White Pigment Adirondack (Ranger)
  • Accs: Wizard Die-cut Machine, Label One Nestabilities (both by Spellbinders),  Ribbon (May Arts), Stamp-a-ma-jig, glitter and button

New Spellbinders

weeds-lcraig-102708.jpg

I’ve been working on a special project, but I had to take a few minutes to work up a card with my new Curved Rectangle Nestabilities from Spellbinders. The thing I enjoy about the Nestabilities line is the ability to make a quick card with coordinating shaped accents. It’s just simple stamping, but with a little extra hhmph! to the finished project.  This finished, shaped card is about 5″ x 3.5″.

  • Stamps: In the Meadow (Lizzie Anne) *edited*
  • Cardstock: Blush Red Light, Suede Dark Brown & Cryogen White (Prism)
  • Ink: Mountain Rose (Adirondack), Celery & Artichoke (Stampin’ Up!)
  • Accs: Ribbon (May Arts), Dazzling Diamonds and Pretties Kit (both Stampin’ Up!)

See you tomorrow!

Thankful Box

thankful-box-lcraig-082808.jpg

I received a box from CK Media yesterday containing the latest Holiday Home (aka Home & Heart) and this project that had been included in the issue. I love this CK publication because it has such beautiful photography and simple, yet elegant ideas for conveying your affections. I’m proud to be included with the talented artists published here, including my sweet friends Dawn Lusk and Julia Stainton.

Continue reading

Ranger Paint Dabbers

paint-dabber-tutorial-lcraig.jpg

I was putting some supplies away this morning, and I realized that I never shared this card and tutorial with you on my blog. This is a card I created for a tutorial at CHF a few months ago. I love the Ranger Paint Dabbers because you get a really thick color lay with them. This pearl is my favorite. You can see the entire tutorial for Paint Dabber Resist HERE.

Have a wonderful Sunday!

  • Stamps: Large Polka Dot Backgrounder, Silhouette Blooms II – Kim Hughes Collection – all Cornish Heritage Farms
  • Cardstock: Prism Cardstock in Frosted Teal & Black, Cryogen White
  • Ink: Watermelon and Black Adirondack Dye Ink by Ranger
  • Accessories: Pearl Adirondack Metallic Paint Dabber by Ranger, Nestabilities Scallop Circle and Classic Circle Dies by Spellbinders, Offray Ribbon and Paper Piercer


WSC49: Monogram & Nestabilities Tutorial

wsc49a-lcraig-052308.jpg

Every good little southern girl needs monogrammed notes! Sweet Ashley doesn’t know it yet, but she’ll be needing several notecards this afternoon. LOL! So, I used my new JustRite monogram stamps (a birthday gift from a sweet, sweet friend) and the sketch today to make a few cards. The monogram stamps are great for quick, easy and personal gifts!

When I got done with the cards last night and was stamping her monogram on the back of the envie, I thought that a scalloped edge would be oh-so-pretty. So, I used my large scalloped rectangle Nestabilities from Ellen Hutson and did just that! Here’s how:

envie-tut-lcraig-052508.jpg

Supplies: scalloped rectangle dies, envelopes and your die cut machine

envie-tut-b-lcraig-052508.jpg

Put the sealing edge of your envelope through the center of the die, and align just the edge of the envelope with the edge of the die. Make sure your scallops will point downward. If you used the other side of the die, they would be inverted.

envie-tut-a-lcraig-052508.jpg

Layer the envelope and die with the appropriate plate sandwich for your die cutting machine and press as normal.

wsc50b-lcraig-052508.jpg

One other thing I wanted to comment on: Square cards sometimes present a problem with square envelopes, so I try to use standard when I can. Don’t be afraid to hang your ribbon off the edge. This will still fit the envelope just fine without bending or messing up the tags.

Check out the other sketch samples by Cambria,  Charmaine, Jenn, Mary Jo, LaurieSharon and Beate while I encourage a 7 year old to complete her necessary social notes. 🙂 I bet you’ll be done before me, and a whole lot happier! Have a wonderful Friday!  

Unmounted Storage Solutions

 unmounted-monkeys-lcraig.jpg

In the last 6 months, I have started using much more unmounted, red rubber (or acrylic) stamps, with the switch came a functional storage issue. Finally last week, I found a way to store my unmounted stamps and sets that I think will work well for me. It’s from Store More Stamps. This is the Starter Set and half of one set of sleeves and inserts. Stamps cling to a sheet that slides in and out of the clear sleeves. There are currently 9 sleeves stored in this starter box, and it is full. The box dimensions are 9″ wide x 5″ tall x 3.5″ deep. 

unmounted-sets-lcraig.jpg

These sheets are 8×8 square, and (to give you a size idea) this photo shows 2 full $14.99 sets from the Rummage Bin line on one 8×8 sheet. Some of the Rummage Bin sets are $24.99 and those fit on one 8×8 sheet leaving spare room for single, unmounted stamps. I slip the index sheets in the back for easy viewing of what is included on each sheet. Because all of my unmounted stamps are backed with foam-mount, I only put one sheet in each sleeve. If you were storing un-clinged red rubber or acrylic, you could put 2 sheets in each sleeve, back to back, doubling your storage space. Extra sheets are available for purchase.

unmounted-background-lcraig.jpg

This is a CD storage box that I store my smaller Kim Hughes sets and Backgrounders in. This box is about 11″ long and will hold about 25 sets and/or backgrounders. I wouldn’t put much more in there or the ability to flip through would be hindered. It’s a great size to sit on the shelf right about my work desk. Very handy to flip through and pull out what I need.

unmounted-lizzie.jpg

Last but certainly not least is my unmounted Lizzie Anne. I love that Lizzie Anne comes to me in a CD case with pretty labels and indexes. This stackable tote from Wal-Mart holds approximately 20 sets, right at my finger tips with little space taken way from my work desk.

 So that’s how I do it. Hope that this helps some of you with storage issues. It has been a real drain thinking about the best way to organize my stuff, but I feel much better now that it’s done. It should be a lot easier to sit down to my work desk and actually stamp something. 

I’ll see you in the morning!

Bloomin’ Gift Set

fall-thoughts-lcraig-122907.jpg

I am in love with this Wild Saffron Line from K&Company. Whenever I have had time to just play since Christmas, I have reached for the die-cut photo mat paper and bright embellishments. Here, I paired them with a few Kim Hughes images for a bit of fun. To make this 4.25″ square card, I needed to trim the 4×6 photo mat down. I cut mine in the middle and then hide the seam with a ribbon.

 fall-birthday-bagalope-lcraig-122907.jpg

I can’t stand to throw anything away, so that little 2″ splice of grid paper became a key element in this little ‘bag-a-lope’ gift sack. It started out as a A2 envelope. The finished dimensions are approximately 5″ tall, 3″ across and about 1.25″ wide. You can see a step-by-step tutorial here

  • Stamps: Tag You’re It and Bloomin’ Beautiful by Kim Hughes for Cornish Heritage Farms

  • CS: Wild Saffron Die-cut Photo Mat, Prism Baby Blue Light and Suede Dark Brown

  • Ink: Palette Burnt Umber

  • Accs: Foo-foo-la buttons, grosgrain ribbon (May Arts), Wild Saffron felt embellishments and journal tags, Nestabilities and Copic Markers

See you tomorrow!


Featured Stamper – Copic Tutorial

fs-lcraig-010608.jpg

It’s always a wonderful Sunday. It’s my favorite day of the week! But, when the afternoon includes time to stamp, it’s all the better. It’s 70 degrees in mid-Missouri, our windows are open, the kids are enjoying the trampoline and Wes is off hunting. Perfect for the Featured Stamper Challenge at SCS.

Today’s FS is Nancy Riley, and I chose her beautiful Happy card, shown here as a springboard for my card. I had some pretty Maybe Baby Daisy D paper that just arrived from Jacksonbelle, and I knew this layout was a perfect start. I added a matting for the patterened squares and used a frame cut from my Nestabilities to showcase this Bloomin’ Beautiful Blossom that is colored with my Copics, Garnet R39.

For the Copic Tutorial click below:

Continue reading

Little maids all in a row…

dew-drops-lcraig-121007.jpg

A shipment from Ellen Hutson last week brought these pretty jeweled bottles to my home. I had one bottle already, and when I realized that Ellen had Cowboy in stock (and that Debbie told the whole world about it! LOL!) I had to rush over and finalize my order. I just love using these Dew Drops by Robin’s Nest. I apply them to finished cards and projects with tacky glue. It dries clear and no brad or eyelet holes to your project. You could also use Crystal Effects or Crystal Accents by Ranger. I think tiny glue dots would work, too. The blurry bottles here hold Cowboy, Flame, Golden Berry and Rain colors. I’ll have a project in the morning using these little beauties.

Allow me….

I wanted to share with you an outstanding customer service experience that I had this week.

It’s no secret that I *LOVE* Curious Iridescent Cryogen White and Poison Ivory cardstocks. The white is an exact match for SU! Shimmery White, and I love that I can get them both at the same place. I phoned Cindy at www.cutcardstock.com on Monday to ask her about folded A1 notecards (3 5/8″ x 5″). I already had Cryogen White envelopes that size, and they are wonderful for notecard sets. The smaller canvas makes for quick, attractive sets, and they are large enough to meet USPS mailing regulations.  I seem to make a ton of these sets at Christmas.

Yesterday, not 2 full days later, I get an email from Cindy that they are cut, scored and in stock. WOO-HOO! So, check it out. You want A1 Envelopes and Notecards (2 seperate items) in Cryogen White. You can also select your shipping method for the best pricing and delivery timing. Placed my order at about 9:20 this morning and they shipped about an hour later. LOVE CINDY and DARRELL at www.cutcardstock.com!